Tìm hiểu về Spring Cloud Eureka Server với ví dụ
1. Eureka Server - Tại sao?
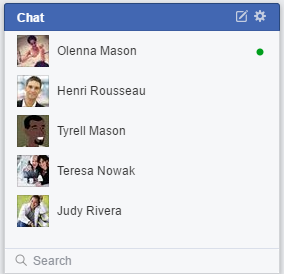
OK, tôi chắc chắn rằng bạn đã từng sử dụng một ứng dụng Chat để nói chuyện những người bạn của mình trên Internet. Khi bạn đăng nhập vào ứng dụng Chat trên máy tính của bạn, điều gì sẽ xẩy ra?
- Bạn đăng nhập vào ứng dụng Chat có nghĩa là bạn đã tự thông báo với Chat Server (Máy chủ Chat) rằng bạn đã trực tuyến.
- Chat Server sẽ cung cấp cho bạn một danh sách các người người khác, họ sẽ có trạng thái trực tuyến (online) hoặc ngoại tuyến (offline).
- Và như vậy bạn đã "Khám phá ra" (Discovered) danh sách những người trực tuyến. Và tất nhiên những người khác cũng khám phá ra bạn.
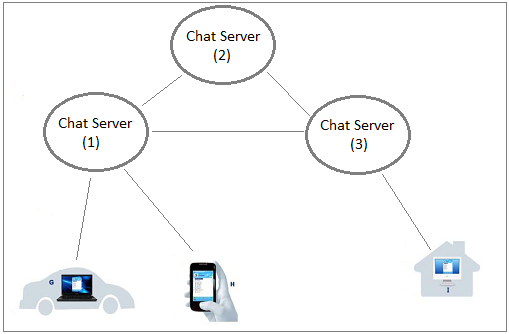
Trong thực tế khi số người sử dụng ứng dụng Chat tăng lên, số lượng Chat Server cũng tăng lên, và chúng có cách để chia sẻ với nhau các trạng thái thái của người dùng.
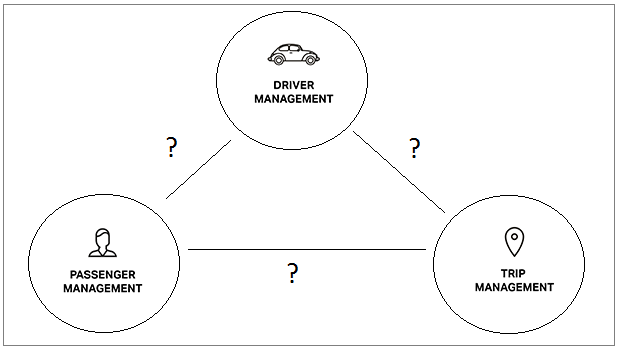
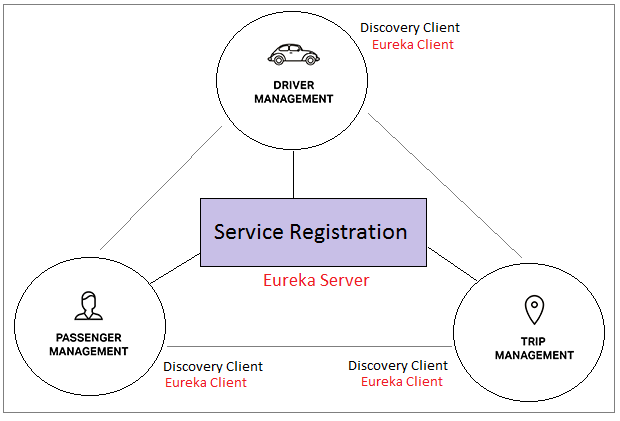
Bạn xây dựng một hệ thống phân tán nó gồm nhiều dịch vụ (ứng dụng) chạy độc lập trên các máy chủ khác nhau. Để cho các dịch vụ (ứng dụng) này có thể nói chuyện với nhau, chúng cần phải "Khám phá" ra nhau. Khi khám phá ra nhau chúng có thể gọi các dịch vụ của nhau. Vì vậy cần có một cái gì đó giống như Chat Server giúp các dịch vụ (ứng dụng) đăng ký sự tồn tại của nó.
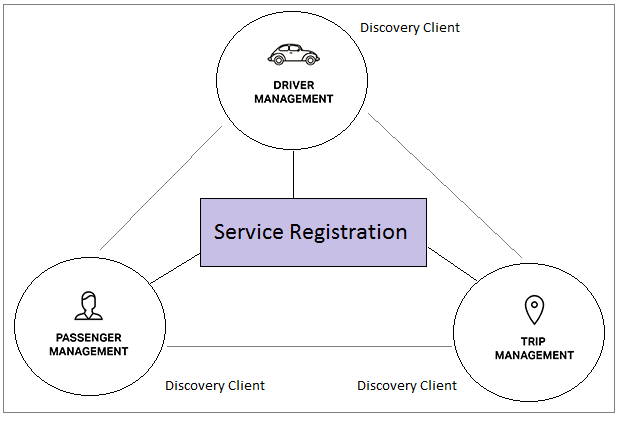
Đó chính là "Service Registration" (Đăng ký dịch vụ). Tất cả các dịch vụ (ứng dụng) trong hệ thống phân tán (distributed system) phải đăng ký với "Service Registration". Nó giống với tất cả mọi người trong một quốc gia phải đi đăng ký giấy khai sinh vậy.
Có nhiều công nghệ để bạn có được một "Service Registration", Spring Cloud cung cấp cho bạn một số giải pháp công nghệ sau:
- Eureka
- Zookeeper
- Cloud Foundry
- Consul
2. Mục tiêu của bài học
Trong bài học này tôi sẽ hướng dẫn bạn tạo một Service Registration (Đăng ký dịch vụ) sử dụng Spring Cloud Eureka Server.
Sẽ là tốt hơn nếu bạn tìm hiểu thêm các thông tin về Netflix và Eureka được giới thiệu trong các bài viết dưới đây:
- Tìm hiểu về Spring Cloud Netflix Eureka
Các vấn đề sẽ được thảo luận trong bài học này:
Bước 1:
- Tạo một Service Registration (Đăng ký dịch vụ) sử dụng Spring Cloud Eureka Server.
- Chạy ứng dụng này trực tiếp trên Eclipse và xem Eureka Monitor (Trình giám sát của Eureka).
Bước 2:
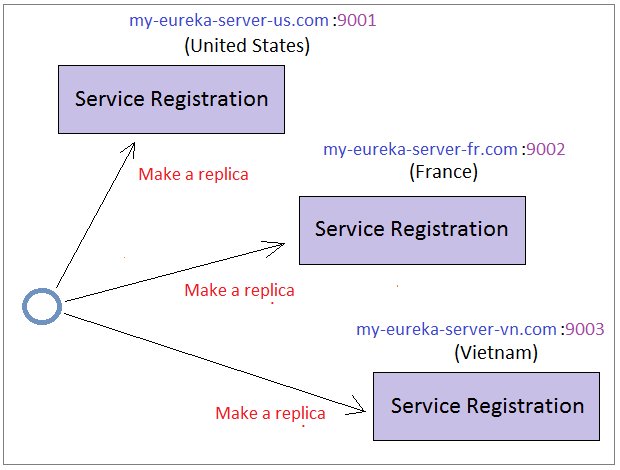
- Tạo các bản sao (replica) cho ứng dụng để triển khai trên các máy chủ khác nhau, mỗi bản sao (replica) sẽ chạy trên một tên miền khác nhau. Ở đây chúng ta giả thiết rằng hệ thống có rất nhiều người dùng vì vậy cần nhiều bản sao chạy trên các máy chủ khác nhau để giảm sự quá tải (Reduce overload).
- Giải thích cơ chế chia sẻ trạng thái giữa các Eureka Server.
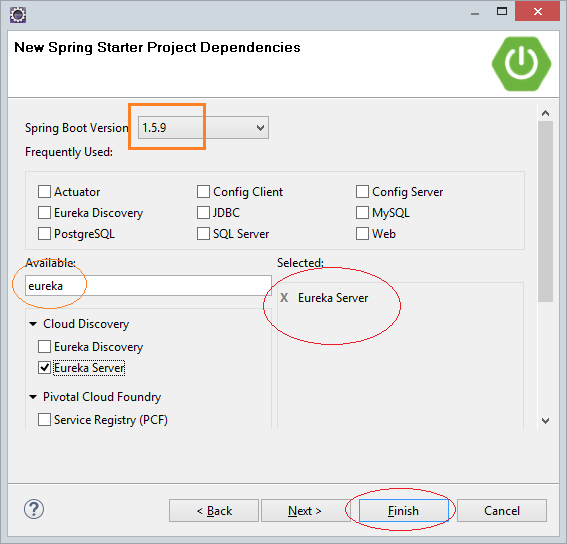
3. Tạo dự án Spring Boot
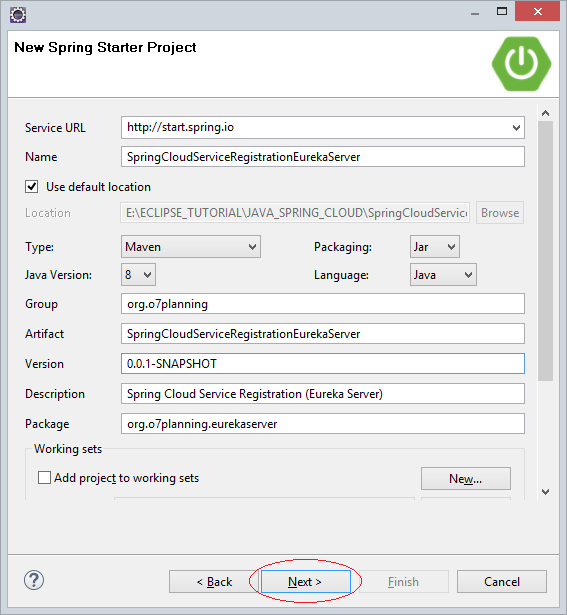
Trên Eclipse tạo một dự án Spring Boot:
Nhập vào:
- Name: SpringCloudServiceRegistrationEurekaServer
- Group: org.o7planning
- Artifact: SpringCloudServiceRegistrationEurekaServer
- Description: Spring Cloud Service Registration (Eureka Server)
- Package: org.o7planning.eurekaserver
pom.xml
<?xml version="1.0" encoding="UTF-8"?>
<project xmlns="http://maven.apache.org/POM/4.0.0"
    xmlns:xsi="http://www.w3.org/2001/XMLSchema-instance"
    xsi:schemaLocation="http://maven.apache.org/POM/4.0.0
      http://maven.apache.org/xsd/maven-4.0.0.xsd">

    <modelVersion>4.0.0</modelVersion>

    <groupId>org.o7planning</groupId>
    <artifactId>SpringCloudServiceRegistrationEurekaServer</artifactId>
    <version>0.0.1-SNAPSHOT</version>
    <packaging>jar</packaging>

    <name>SpringCloudServiceRegistrationEurekaServer</name>
    <description>Spring Cloud Service Registration (Eureka Server)</description>

    <parent>
        <groupId>org.springframework.boot</groupId>
        <artifactId>spring-boot-starter-parent</artifactId>
        <version>1.5.9.RELEASE</version>
        <relativePath/> <!-- lookup parent from repository -->
    </parent>

    <properties>
        <project.build.sourceEncoding>UTF-8</project.build.sourceEncoding>
        <project.reporting.outputEncoding>UTF-8</project.reporting.outputEncoding>
        <java.version>1.8</java.version>
        <spring-cloud.version>Edgware.RELEASE</spring-cloud.version>
    </properties>

    <dependencies>
        <dependency>
            <groupId>org.springframework.cloud</groupId>
            <artifactId>spring-cloud-starter-eureka-server</artifactId>
        </dependency>

        <dependency>
            <groupId>org.springframework.boot</groupId>
            <artifactId>spring-boot-starter-test</artifactId>
            <scope>test</scope>
        </dependency>
    </dependencies>

    <dependencyManagement>
        <dependencies>
            <dependency>
                <groupId>org.springframework.cloud</groupId>
                <artifactId>spring-cloud-dependencies</artifactId>
                <version>${spring-cloud.version}</version>
                <type>pom</type>
                <scope>import</scope>
            </dependency>
        </dependencies>
    </dependencyManagement>

    <build>
        <plugins>
            <plugin>
                <groupId>org.springframework.boot</groupId>
                <artifactId>spring-boot-maven-plugin</artifactId>
            </plugin>
        </plugins>
    </build>


</project>
4. @EnableEurekaServer
Để ứng dụng này trở thành một Service Registration (Đăng ký dịch vụ) bạn cần sử dụng @EnableEurekaServer, Annotation này thông báo với Spring rằng hãy chạy một dịch vụ đăng ký theo công nghệ của Netflix (Netflix Eureka).
SpringCloudServiceRegistrationEurekaServerApplication.java
package org.o7planning.eurekaserver;

import org.springframework.boot.SpringApplication;
import org.springframework.boot.autoconfigure.SpringBootApplication;
import org.springframework.cloud.netflix.eureka.server.EnableEurekaServer;

@EnableEurekaServer
@SpringBootApplication
public class SpringCloudServiceRegistrationEurekaServerApplication {

    public static void main(String[] args) {
        SpringApplication.run(SpringCloudServiceRegistrationEurekaServerApplication.class, args);
    }
}
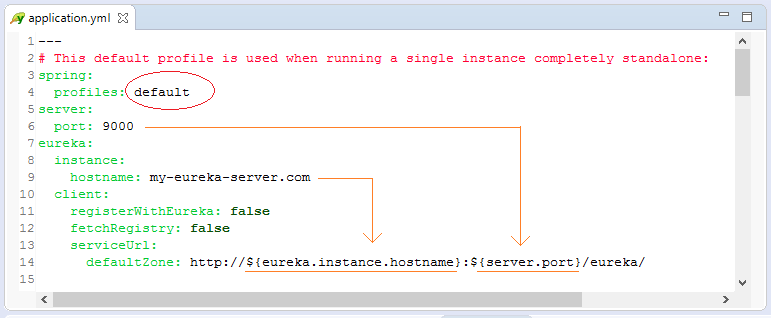
application.yml
---
# This default profile is used when running a single instance completely standalone:
spring:
  profiles: default
server:
  port: 9000
eureka:
  instance:
    hostname: my-eureka-server.com
  client:
    registerWithEureka: false
    fetchRegistry: false
    serviceUrl:
      defaultZone: http://${eureka.instance.hostname}:${server.port}/eureka/

# united-states, france, and vietnam illustrate running 3 intercommunicating instances.
# This example has them running side-by-side on localhost
# -- which is unrealistic in production
# -- but does illustrate how multiple instances collaborate.
#
# Run by opening 3 separate command prompts:
# java -jar -Dspring.profiles.active=united-states SpringCloudServiceRegistrationEurekaServer.jar
# java -jar -Dspring.profiles.active=france SpringCloudServiceRegistrationEurekaServer.jar
# java -jar -Dspring.profiles.active=vietnam SpringCloudServiceRegistrationEurekaServer.jar

---
spring:
  profiles: united-states
  application:
    name: eureka-server-clustered   # ==> This is Service-Id
server:
  port: 9001
eureka:
  instance:
    hostname: my-eureka-server-us.com
  client:
    registerWithEureka: true
    fetchRegistry: true
    serviceUrl:
      defaultZone: http://my-eureka-server-fr.com:9002/eureka/,http://my-eureka-server-vn.com:9003/eureka/

---
spring:
  profiles: france
  application:
    name: eureka-server-clustered   # ==> This is Service-Id
server:
  port: 9002
eureka:
  instance:
    hostname: my-eureka-server-fr.com
  client:
    registerWithEureka: true
    fetchRegistry: true
    serviceUrl:
      defaultZone: http://my-eureka-server-us.com:9001/eureka/,http://my-eureka-server-vn.com:9003/eureka/

---
spring:
  profiles: vietnam
  application:
    name: eureka-server-clustered    # ==> This is Service-Id
server:
  port: 9003
eureka:
  instance:
    hostname: my-eureka-server-vn.com
  client:
    registerWithEureka: true
    fetchRegistry: true
    serviceUrl:
      defaultZone: http://my-eureka-server-us.com:9001/eureka/,http://my-eureka-server-fr.com:9002/eureka/
Trong ứng dụng này tôi cấu hình trên tập tin application.yml thay vì application.properties, bạn có thể tìm hiểu thêm sự khác biệt giữa tập tin *.yml và *.properties theo bài viết dưới đây:
- properties vs yml
5. Chạy ứng dụng trên Eclipse
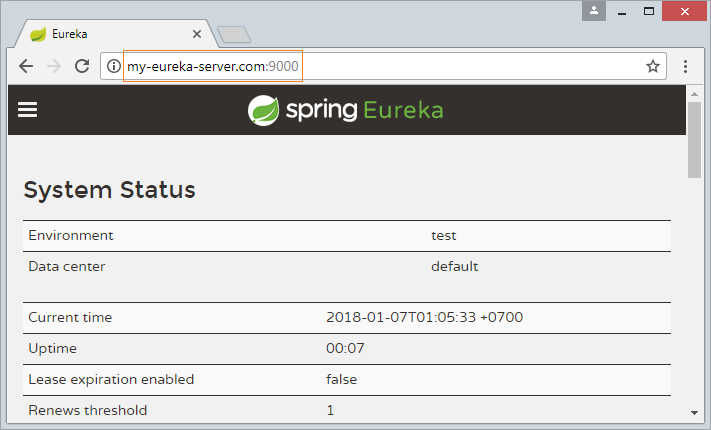
Khi bạn chạy ứng dụng này trực tiếp trên Eclipse, hồ sơ mặc định (default profile) sẽ được sử dụng để cấu hình cho ứng dụng này.
Eureka Monitor (Trình giám sát của Eureka) cho phép bạn nhìn thấy danh sách các dịch vụ (ứng dụng) đang hoạt động và đã đăng ký với Eureka Server này, đồng thời cho phép bạn nhìn thấy các bản sao (replica) của ứng dụng này đang chạy trên hệ thống phân tán. Bạn có thể truy cập vào Eureka Monitor theo URL dưới đây,
Hồ sơ "default" (default profile) được cấu hình để chạy trên tên miền my-eureka-server.com, bằng cách cấu hình tên miền trên tập tin "hosts" bạn có thể có được tên miền đó.
Trên Windows mở tập tin:
- C:\Windows\System32\drivers\etc\hosts
Thêm vào đoạn cấu hình sau:
C:\Windows\System32\drivers\etc\hosts
127.0.0.1       my-eureka-server.com
127.0.0.1       my-eureka-server-us.com
127.0.0.1       my-eureka-server-fr.com
127.0.0.1       my-eureka-server-vn.com
Để sửa tập tin "hosts" trong các hệ điều hành khác, bạn có thể xem hướng dẫn dưới đây:
Và bạn đã có được tên miền my-eureka.com, chú ý rằng tên miền này chỉ có tác dụng trên máy tính của bạn.
6. Chạy nhiều bản sao (replica)
Trước hết bạn cần phải sử dụng chức năng "Maven Install" để tạo ra tâp tin jar. Nhấn phải chuột vào project chọn:
- Run As/Maven Install
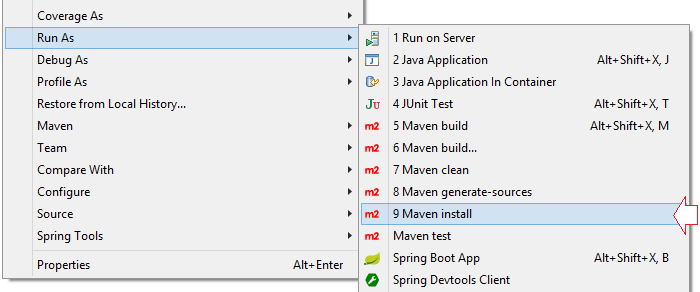
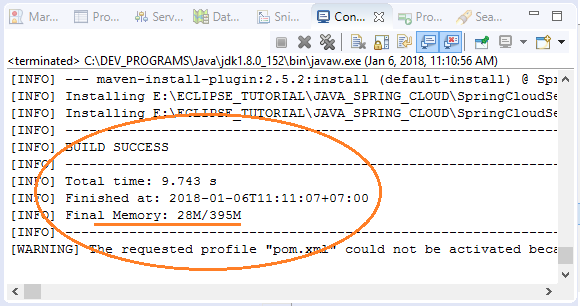
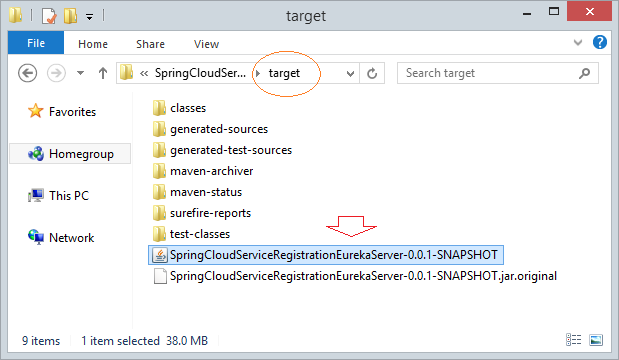
Sau khi thực thi "Maven Install" thành công, bạn có được một tập tin jar nằm trong thư mục target của project.
Copy tập tin jar vừa được tạo ra vào một thư mục nào đó, đồng thời tạo 3 tập tin BAT:
- eureka-server-us.bat
- eureka-server-fr.bat
- eureka-server-vn.bat
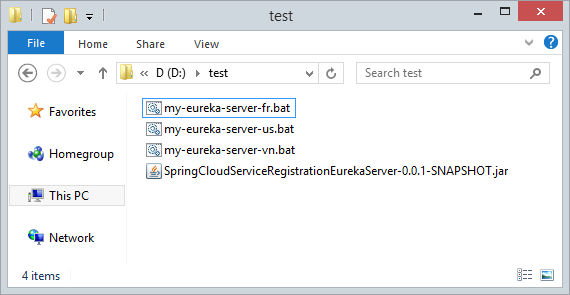
my-eureka-server-us.bat
java -jar -Dspring.profiles.active=united-states SpringCloudServiceRegistrationEurekaServer-0.0.1-SNAPSHOT.jarmy-eureka-server-fr.bat
java -jar -Dspring.profiles.active=france SpringCloudServiceRegistrationEurekaServer-0.0.1-SNAPSHOT.jarmy-eureka-server-vn.bat
java -jar -Dspring.profiles.active=vietnam SpringCloudServiceRegistrationEurekaServer-0.0.1-SNAPSHOT.jarChúng ta đang mô phỏng việc tạo ra 3 bản sao (replica) và triển khai chúng trên 3 máy chủ khác nhau, với 3 tên miền khác nhau.

Chạy cả 3 tập tin BAT nói trên.
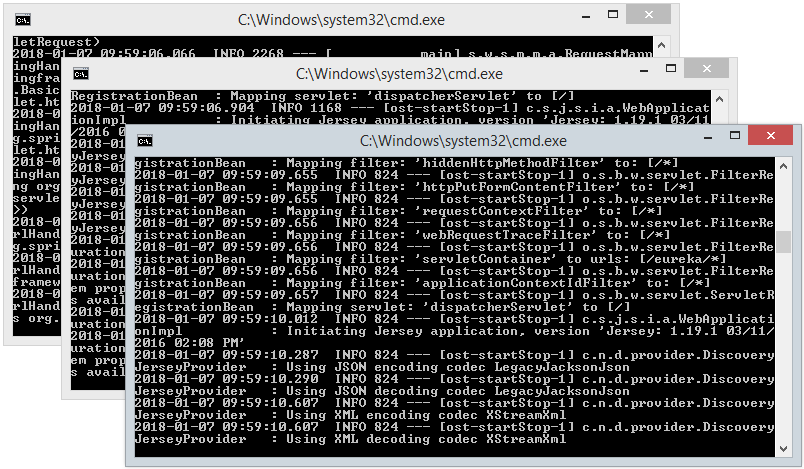
OK, bây giờ bạn có thể truy cập vào các đường dẫn sau và xem kết quả:

Các hướng dẫn Spring Cloud
- Điện toán đám mây (Cloud Computing) là gì?
- Giới thiệu về Netflix và công nghệ điện toán đám mây của họ
- Giới thiệu về Spring Cloud
- Tìm hiểu về Spring Cloud Config Server với ví dụ
- Tìm hiểu về Spring Cloud Config Client với ví dụ
- Tìm hiểu về Spring Cloud Eureka Server với ví dụ
- Tìm hiểu về Spring Cloud Discovery Eureka Client với ví dụ
- Tìm hiểu về cân bằng tải trong Spring Cloud với Ribbon và ví dụ
Show More
