Hướng dẫn và ví dụ CSS Overflow
1. CSS Overflow
Khi nội dung của một phần tử lớn hơn so với không gian mà phần tử cung cấp, nội dung có thể bị tràn ra ngoài. CSS overflow cho phép bạn thiết lập hành vi của phần tử trong trường hợp này.
Chú ý: CSS overflow chỉ làm việc với các phần tử khối (block element) được chỉ định chiều cao cụ thể.
Các giá trị có thể của CSS overflow:
- visible
- hidden
- scroll
- auto
2. CSS {overflow: visible}
CSS {overflow: visible}: (Mặc định). Nếu nội dung của phần tử lớn hơn không gian mà phần tử cung cấp nó sẽ tràn ra ngoài, đây là hành vi mặc định.
overflow-visible-example.html
<!DOCTYPE html>
<html>
   <head>
      <title>CSS overflow</title>
      <meta charset="UTF-8"/>
      <style>
         div {
           background-color: #d6eaf8;
           padding: 5px;
           margin-top: 10px;
         }
      </style>
   </head>
   <body>
       <h1>CSS {overflow:visible} (Default)</h1>
       <hr/>
       <div style="width: 200px; height: 100px; overflow: visible">
             Michaelmas term lately over, and the Lord Chancellor
             sitting in Lincoln's Inn Hall. Implacable November weather.
             As much mud in the streets as if the waters
             had but newly retired from the face of the earth.
       </div>
   </body>
</html>
3. CSS {overflow: hidden}
CSS {overflow: hidden}: Phần nội dung tràn ra ngoài không gian của phần tử sẽ bị ẩn đi.
overflow-hidden-example.html
<!DOCTYPE html>
<html>
   <head>
      <title>CSS overflow</title>
      <meta charset="UTF-8"/>
      <style>
         div {
           background-color: #d6eaf8;
           padding: 5px;
           margin-top: 10px;
         }
      </style>
   </head>
   <body>
       <h1>CSS {overflow:hidden}</h1>
       <hr/>
       <div style="width: 200px; height: 100px; overflow: hidden">
             Michaelmas term lately over, and the Lord Chancellor
             sitting in Lincoln's Inn Hall. Implacable November weather.
             As much mud in the streets as if the waters
             had but newly retired from the face of the earth.
       </div>
   </body>
</html>
4. CSS {overflow: scroll}
CSS {overflow: scroll}: Trình duyệt sẽ tạo ra thanh cuộn cho phần tử, người dùng có thể sử dụng thanh cuộn để xem phần nội dung còn lại.
Chú ý: Với hầu hết các trình duyệt và hệ điều hành, thanh cuộn của phần tử luôn xuất hiện kể cả khi nội dung của phần tử nhỏ hơn không gian mà phần tử cung cấp. Trường hợp ngoại lệ xẩy ra với hệ điều hành Mac OSX Lion, thanh cuộn chỉ xuất hiện khi cần thiết.
overflow-scroll-example.html
<!DOCTYPE html>
<html>
<head>
<title>CSS overflow</title>
<meta charset="UTF-8"/>
<style>
div {
background-color: #d6eaf8;
padding: 5px;
margin-top: 10px;
}
</style>
</head>
<body>
<h1>CSS {overflow:scroll}</h1>
<hr/>
<div style="width: 200px; height: 100px; overflow: scroll">
Michaelmas term lately over, and the Lord Chancellor
sitting in Lincoln's Inn Hall. Implacable November weather.
As much mud in the streets as if the waters
had but newly retired from the face of the earth.
</div>
</body>
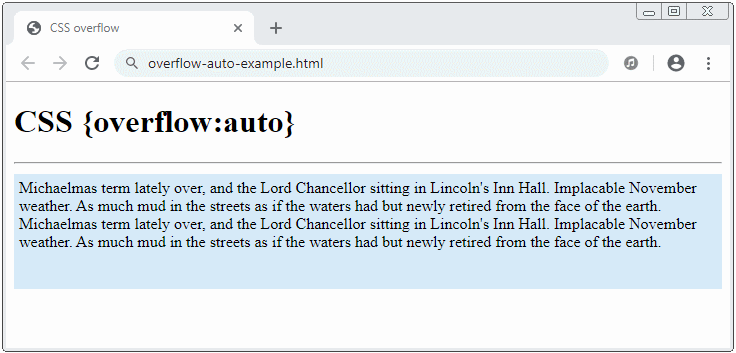
</html>5. CSS {overflow: auto}
CSS {overflow: auto}: Tương tự như 'scroll', nhưng thanh cuộn chỉ xuất hiện khi nội dung lớn hơn không gian mà phần tử cung cấp.
overflow-auto-example.html
<!DOCTYPE html>
<html>
   <head>
      <title>CSS overflow</title>
      <meta charset="UTF-8"/>
      <style>
         div {
           background-color: #d6eaf8;
           padding: 5px;
           margin-top: 10px;
         }
      </style>
   </head>
   <body>
       <h1>CSS {overflow:auto}</h1>
       <hr/>
       <div style="height: 105px; overflow: auto">
             Michaelmas term lately over, and the Lord Chancellor
             sitting in Lincoln's Inn Hall. Implacable November weather.
             As much mud in the streets as if the waters
             had but newly retired from the face of the earth.
             <br/>
             Michaelmas term lately over, and the Lord Chancellor
             sitting in Lincoln's Inn Hall. Implacable November weather.
             As much mud in the streets as if the waters
             had but newly retired from the face of the earth.
       </div>
   </body>
</html>
6. CSS overflow-x, overflow-y
Thay vì sử dụng CSS overflow bạn có thể sử dụng CSS overflow-x và CSS overflow-y. Các giá trị có thể của CSS overflow-x, CSS overflow-y giống như CSS overflow.
- visible
- hidden
- scroll
- auto
CSS overflow-x
CSS overflow-x được sử dụng để thiết lập hành vi của phần tử khi nội dung của nó bị tràn (overflow) ra ngoài phần tử theo phương nằm ngang.
CSS overflow-y
CSS overflow-y được sử dụng để thiết lập hành vi của phần tử khi nội dung của nó bị tràn (overflow) ra ngoài phần tử theo phương thẳng đứng.
Chú ý: Bạn có thể chỉ định một cặp giá trị cho (overflow-x,overflow-y), nhưng trình duyệt sẽ tính toán lại cặp giá trị này, bởi vì cặp giá trị mà ban chỉ định có thể không thực tế. Chẳng hạn (visible, hidden) sẽ được tính toán lại thành (scroll, hidden).
Bảng dưới đây gồm 2 cột, cột thứ nhất chứa các cặp giá trị mà bạn chỉ định, cột thứ hai chứa các cặp giá trị mà trình duyệt đã tính toán lại.
Specified values | Computed values |
(visible, visible) | (visible, visible) |
(visible, hidden) | (scroll, hidden) |
(visible, scroll) | (scroll, scroll) |
(visible, auto) | (scroll, auto) |
(hidden, visible) | (hidden, scroll) |
(hidden, hidden) | (hidden, hidden) |
(hidden, scroll) | (hidden, scroll) |
(hidden, auto) | (hidden, auto) |
(scroll, visible) | (scroll, scroll) |
(scroll, hidden) | (scroll, hidden) |
(scroll, scroll) | (scroll, scroll) |
(scroll, auto) | (scroll, auto) |
(auto, visible) | (auto, scroll) |
(auto, hidden) | (auto, hidden) |
(auto, scroll) | (auto, scroll) |
(auto, auto) | (auto, auto) |
overflow-x-y-example.js
function changeOverflowX(event) {
   value = event.target.value;
   var myDiv = document.getElementById("myDiv");
   myDiv.style.overflowX = value;
}
function changeOverflowY(event) {
   value = event.target.value;
   var myDiv = document.getElementById("myDiv");
   myDiv.style.overflowY = value;
}
overflow-x-y-example.html
<!DOCTYPE html>
<html>
   <head>
      <title>CSS overflow</title>
      <meta charset="UTF-8"/>
      <style>
         #myDiv  {
           background-color: #d6eaf8;
           padding: 5px;
           margin-top: 15px;
         }
      </style>
      <script src="overflow-x-y-example.js"> </script>
   </head>
   <body>
       <h2>CSS overflow-x, overflow-y</h2>
       <hr/>
       <div style="display: inline-block; width: 150px;">
         <p>Overflow-x:</p>
         <input type="radio" name="overflowX" value="visible" onClick="changeOverflowX(event)" checked/> Visible <br/>
         <input type="radio" name="overflowX" value="hidden" onClick="changeOverflowX(event)"/> Hidden <br/>
         <input type="radio" name="overflowX" value="scroll" onClick="changeOverflowX(event)"/> Scroll <br/>
         <input type="radio" name="overflowX" value="auto" onClick="changeOverflowX(event)"/> Auto <br/>
       </div>
       <div style="display: inline-block; width: 150px;">
         <p>Overflow-y:</p>
         <input type="radio" name="overflowY" value="visible" onClick="changeOverflowY(event)" checked/> Visible <br/>
         <input type="radio" name="overflowY" value="hidden" onClick="changeOverflowY(event)"/> Hidden <br/>
         <input type="radio" name="overflowY" value="scroll" onClick="changeOverflowY(event)"/> Scroll <br/>
         <input type="radio" name="overflowY" value="auto" onClick="changeOverflowY(event)"/> Auto <br/>
       </div>
       <div id="infoDiv">
       </div>
       <div id="myDiv" style="height: 50px; width:200px; overflow-x: visible;">
           The value of Pi is <br/>
           3.1415926535897932384626433832795029.

           The value of e is <br/>

           2.718281828459045235360287471352662
       </div>
   </body>
</html>
Các hướng dẫn CSS
- Các đơn vị tính trong CSS
- Hướng dẫn và ví dụ CSS Selectors cơ bản
- Hướng dẫn và ví dụ CSS Attribute Selector
- Hướng dẫn và ví dụ CSS Selectors kết hợp
- Hướng dẫn và ví dụ CSS Backgrounds
- Hướng dẫn và ví dụ CSS Opacity
- Hướng dẫn và ví dụ CSS Padding
- Hướng dẫn và ví dụ CSS Margins
- Hướng dẫn và ví dụ CSS Borders
- Hướng dẫn và ví dụ CSS Outline
- Hướng dẫn và ví dụ CSS box-sizing
- Hướng dẫn và ví dụ CSS max-width và min-width
- Các từ khóa min-content, max-content, fit-content, stretch trong CSS
- Hướng dẫn và ví dụ CSS Links
- Hướng dẫn và ví dụ CSS Fonts
- Tìm hiểu về Generic Font Family trong CSS
- Hướng dẫn và ví dụ CSS @font-face
- Hướng dẫn và ví dụ CSS Align
- Hướng dẫn và ví dụ CSS Cursors
- Hướng dẫn và ví dụ CSS Overflow
- Hướng dẫn và ví dụ CSS Lists
- Hướng dẫn và ví dụ CSS Tables
- Hướng dẫn và ví dụ CSS visibility
- Hướng dẫn và ví dụ CSS Display
- Hướng dẫn và ví dụ CSS Grid Layout
- Hướng dẫn và ví dụ CSS Float và Clear
- Hướng dẫn và ví dụ CSS Position
- Hướng dẫn và ví dụ CSS line-height
- Hướng dẫn và ví dụ CSS text-align
- Hướng dẫn và ví dụ CSS text-decoration
Show More
