Hướng dẫn và ví dụ Flutter TextField
Trong Flutter, TextField là phần tử đầu vào chứa dữ liệu chữ và số, chẳng hạn như tên, mật khẩu, địa chỉ, v.v. Đây là Widget cho phép người dùng nhập thông tin văn bản thông qua bàn phím. Nó có thể là trường văn bản một dòng (khi chỉ yêu cầu một dòng thông tin) hoặc trường văn bản nhiều dòng (khi cần nhiều hơn một dòng thông tin).

Theo mặc định, Flutter trang trí TextField bằng một gạch chân, để tuỳ biến trang trí bạn có thể sử dụng thuộc tính decoration. Nếu decoration là null trang trí sẽ hoàn toàn bị loại bỏ.
TextField thường được đặt trong một Form vì tiện ích (widget) này hỗ trợ việc xác thực (validate) nhiều trường dữ liệu trước khi dữ liệu được chuyển tới máy chủ để lưu trữ.
Trong nhiều trường hợp bạn có thể sử dụng TextFormField để thay thế cho TextField. TextFormField là một widget bao bọc một TextField trong một FormField, vì vậy tự nó có khả năng xác thực (validate) dữ liệu của chính mình.
- Flutter TextFormFied
1. Flutter TextField
TextField Constructor:
TextFieldConstructor
const TextField(
    {Key key,
    TextEditingController controller,
    FocusNode focusNode,
    InputDecoration decoration: const InputDecoration(),
    TextInputType keyboardType,
    TextInputAction textInputAction,
    TextCapitalization textCapitalization: TextCapitalization.none,
    TextStyle style,
    StrutStyle strutStyle,
    TextAlign textAlign: TextAlign.start,
    TextAlignVertical textAlignVertical,
    TextDirection textDirection,
    bool readOnly: false,
    ToolbarOptions toolbarOptions,
    bool showCursor,
    bool autofocus: false,
    String obscuringCharacter: '•',
    bool obscureText: false,
    bool autocorrect: true,
    SmartDashesType smartDashesType,
    SmartQuotesType smartQuotesType,
    bool enableSuggestions: true,
    int maxLines: 1,
    int minLines,
    bool expands: false,
    int maxLength,
    bool maxLengthEnforced: true,
    ValueChanged<String> onChanged,
    VoidCallback onEditingComplete,
    ValueChanged<String> onSubmitted,
    AppPrivateCommandCallback onAppPrivateCommand,
    List<TextInputFormatter> inputFormatters,
    bool enabled,
    double cursorWidth: 2.0,
    double cursorHeight,
    Radius cursorRadius,
    Color cursorColor,
    BoxHeightStyle selectionHeightStyle: ui.BoxHeightStyle.tight,
    BoxWidthStyle selectionWidthStyle: ui.BoxWidthStyle.tight,
    Brightness keyboardAppearance,
    EdgeInsets scrollPadding: const EdgeInsets.all(20.0),
    DragStartBehavior dragStartBehavior: DragStartBehavior.start,
    bool enableInteractiveSelection: true,
    GestureTapCallback onTap,
    MouseCursor mouseCursor,
    InputCounterWidgetBuilder buildCounter,
    ScrollController scrollController,
    ScrollPhysics scrollPhysics,
    Iterable<String> autofillHints,
    String restorationId}
)
Ví dụ:
Tạo một TextField đơn giản nhất. Theo mặc định nó được trang trí bởi một gạch chân.
Scaffold(
  appBar: AppBar(
    backgroundColor: Theme.of(context).colorScheme.inversePrimary,
    title: const Text('Flutter TextField'),
  ),
  body: const Center(
    child: TextField(),
  ),
)
Ví dụ:
Sử dụng thuộc tính decoration để trang trí cho TextField:
Center(
  child: Padding(
    padding: EdgeInsets.symmetric(vertical: 15, horizontal: 10),
    child: Column(
      children: <Widget>[
        TextField(
          decoration: InputDecoration(
            border: OutlineInputBorder(),
            labelText: 'User Name',
            hintText: 'Enter Your Name',
          ),
        ),
        SizedBox(height: 10),
        TextField(
          obscureText: true,
          decoration: InputDecoration(
            border: OutlineInputBorder(),
            labelText: 'Password',
            hintText: 'Enter Password',
          ),
        ),
      ],
    ),
  ),
),
Ví dụ:
Sử dụng thuộc tính decoration để thêm các biểu tượng vào một TextField:
Center(
  child: Padding(
    padding: EdgeInsets.symmetric(vertical: 15, horizontal: 10),
    child: Column(
      children: <Widget>[
        TextField(
          decoration: InputDecoration(
            border: OutlineInputBorder(),
            labelText: 'User Name',
            hintText: 'Enter Your Name',
            prefixIcon: Icon(
              Icons.person_2_outlined,
              color: Colors.blue,
            ),
            suffixIcon: Icon(
              Icons.check,
              color: Colors.blue,
            ),
          ),
        ),
        SizedBox(height: 10),
        TextField(
          obscureText: true,
          decoration: InputDecoration(
            border: OutlineInputBorder(),
            labelText: 'Password',
            hintText: 'Enter Password',
            prefixIcon: Icon(
              Icons.wifi_password,
              color: Colors.blue,
            ),
            suffixIcon: Icon(
              Icons.check,
              color: Colors.blue,
            ),
          ),
        ),
      ],
    ),
  ),
)
Ví dụ:
Theo mặc định, TextField chỉ cho phép người dùng nhập văn bản trên một dòng. Nếu bạn muốn nhập văn bản trên nhiều dòng thì thuộc tính minLines hoặc maxLines phải được sét đặt giá trị lớn hơn 1.
minLines | Chỉ định số lượng dòng nhỏ nhất mà TextField sẽ hiển thị. |
maxLines | Chỉ định số lượng dòng lớn nhất mà TextField sẽ hiển thị. Nếu số lượng dòng mà người dùng nhập vào nhiều hơn maxLines thanh cuộn thẳng đứng sẽ xuất hiện. |
TextField(
  decoration: InputDecoration(
    border: OutlineInputBorder(),
    labelText: 'Description',
  ),
  minLines: 2,
  maxLines: 4,
)
2. onChanged
ValueChanged<String> onChangedThuộc tính onChanged được sử dụng để lắng nghe nội dung thay đổi của TextField, nó là một trong những cách để bạn lấy được nội dung văn bản của TextField. Để lấy nội dung văn bản của TextField bạn cũng có thể sử dụng thuộc tính controller.
textfield_onChanged_ex1.dart
TextField(
  decoration: const InputDecoration(
    border: OutlineInputBorder(),
    labelText: 'User Name',
    hintText: 'Enter Your Name',
  ),
  onChanged: (String text) {
    print('Text: $text');
  },
)
3. controller
TextEditingController controllerThuộc tính controller cho phép bạn điều khiển nội dung văn bản của TextField, chẳng hạn, sét đặt văn bản ban đầu cho TextField, sét đặt và lấy ra văn bản hiện thời.
textfield_controller_ex1.dart
import 'package:flutter/material.dart';

void main() {
  runApp(const MyApp());
}

class MyApp extends StatelessWidget {
  const MyApp({super.key});
  @override
  Widget build(BuildContext context) {
    return MaterialApp(
      title: 'Flutter TextField',
      debugShowCheckedModeBanner: false,
      theme: ThemeData(
        colorScheme: ColorScheme.fromSeed(seedColor: Colors.deepPurple),
        useMaterial3: true,
      ),
      home: MyHomePage(),
    );
  }
}

class MyHomePage extends StatefulWidget {
  @override
  State<StatefulWidget> createState() {
    return _MyHomePageState();
  }
}

class _MyHomePageState extends State<MyHomePage> {
  late TextEditingController controllerFirstName;
  late TextEditingController controllerLastName;
  late TextEditingController controllerFullName;

  @override
  void initState() {
    super.initState();
    controllerFirstName = TextEditingController();
    controllerLastName = TextEditingController();
    // TextEditingController with default text:
    controllerFullName = TextEditingController(text: '[Empty Full Name]');
  }

  @override
  Widget build(BuildContext context) {
    return Scaffold(
      appBar: AppBar(
        backgroundColor: Theme.of(context).colorScheme.inversePrimary,
        title: const Text('Flutter TextField - controller'),
      ),
      body: Center(
        child: Padding(
          padding: const EdgeInsets.symmetric(vertical: 15, horizontal: 10),
          child: Column(
            children: <Widget>[
              TextField(
                controller: controllerFirstName,
                decoration: const InputDecoration(
                  border: OutlineInputBorder(),
                  labelText: 'First Name',
                ),
                onChanged: (String text) {
                  setFullName();
                },
              ),
              const SizedBox(height: 10),
              TextField(
                controller: controllerLastName,
                decoration: const InputDecoration(
                  border: OutlineInputBorder(),
                  labelText: 'Last Name',
                ),
                onChanged: (String text) {
                  setFullName();
                },
              ),
              const SizedBox(height: 10),
              TextField(
                controller: controllerFullName,
                readOnly: true,
                decoration: const InputDecoration(
                  border: OutlineInputBorder(),
                  labelText: 'Full Name',
                ),
                onChanged: (String text) {
                  setFullName();
                },
              ),
            ],
          ),
        ),
      ),
    );
  }

  void setFullName() {
    String firstName = controllerFirstName.value.text;
    String lastName = controllerLastName.value.text;
    String fullName = '$firstName $lastName';
    controllerFullName.text = fullName;
    setState(() {});
  }
}
4. keyboardType
TextInputType? keyboardTypeThuộc tính keyboardType được sử dụng để chỉ định kiểu bàn phím sẽ hiển thị khi người dùng nhập văn bản vào một TextField trên thiết bị di động.
Các kiểu bàn phím được hỗ trợ:
- text, multiline, number, phone, datetime, emailAddress, url, visiblePassword, name, streetAddress, none
 TextInputType.text | 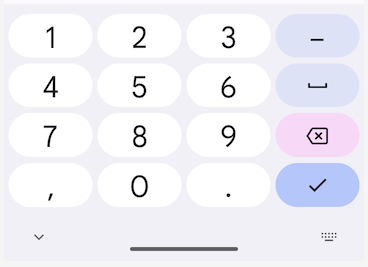 TextInputType.number |
6. onEditingComplete
VoidCallback onEditingComplete

typedef VoidCallback = void Function();
onEditingComplete là sự kiện được phát ra khi người dùng hoàn thành việc sửa đổi nội dung văn bản của TextField. Sự kiện này xẩy ra trước sự kiện onSubmitted. Để lấy ra nội dung văn bản hiện thời bạn phải sử dụng TextEditingController.
Các tình huống xẩy ra sự kiện onEditingComplete:
- Người dùng nhập văn bản vào một TextField sau đó chuyển con trỏ sang một widget khác.
- Người dùng nhập văn bản vào một TextField sau đó nhấn nút "DONE" hoặc "SEND" trên bàn phím (của thiết bị di động), sự kiện onEditingComplete xẩy ra và tiếp theo là sự kiện onSubmitted.
7. onSubmitted
ValueChanged<String> onSubmitted

typedef ValueChanged<T> = void Function(T value);
Sự kiện onSubmitted xẩy ra khi người dùng nhấn nút "DONE" hoặc "SEND" trên bàn phím. Phương thức Callback sẽ bao gồm nội dung văn bản hiện tại của TextField. Sự kiện onSubmit luôn xẩy ra sau sự kiện onEditingComplete.
Trên Web nếu TextField không cho phép nhiều dòng, người dùng nhấn ENTER cũng sẽ tạo ra sự kiện onSubmitted.
Ví dụ:
Trong ví dụ dưới đây, Chúng ta có một màn hình đăng nhập, khi người dùng nhập thông tin vào các TextField(s) và nhấn ENTER (Hoặc DONE), phương thức doLogin() sẽ được gọi, điều này tương đương với việc người dùng nhấn vào nút "Login".
Trên Web, nhập vào "User Name" và nhấn ENTER, sau đó nhập "Password" và nhấn ENTER. | Trên thiết bị di động, nhập vào "User Name" và nhấn nút "DONE", tiếp theo nhập vào "Password" và nhấn nút "DONE". |
 Run on Web (Browser) |  |
textfield_onSubmit_ex1.dart
import 'package:flutter/material.dart';

void main() {
  runApp(const MyApp());
}

class MyApp extends StatelessWidget {
  const MyApp({super.key});
  @override
  Widget build(BuildContext context) {
    return MaterialApp(
      title: 'Flutter TextField',
      debugShowCheckedModeBanner: false,
      theme: ThemeData(
        colorScheme: ColorScheme.fromSeed(seedColor: Colors.deepPurple),
        useMaterial3: true,
      ),
      home: MyHomePage(),
    );
  }
}

class MyHomePage extends StatefulWidget {
  @override
  State<StatefulWidget> createState() {
    return _MyHomePageState();
  }
}

class _MyHomePageState extends State<MyHomePage> {
  late TextEditingController controllerUserName;
  late TextEditingController controllerPassword;

  @override
  void initState() {
    super.initState();
    controllerUserName = TextEditingController();
    controllerPassword = TextEditingController();
  }

  @override
  Widget build(BuildContext context) {
    return Scaffold(
      appBar: AppBar(
        backgroundColor: Theme.of(context).colorScheme.inversePrimary,
        title: const Text('Flutter TextField - onSubmitted'),
      ),
      body: Center(
        child: Padding(
          padding: const EdgeInsets.symmetric(vertical: 15, horizontal: 10),
          child: Column(
            children: <Widget>[
              TextField(
                controller: controllerUserName,
                decoration: const InputDecoration(
                  border: OutlineInputBorder(),
                  labelText: 'User Name',
                ),
                onSubmitted: (String text) {
                  doLogin();
                },
              ),
              const SizedBox(height: 10),
              TextField(
                controller: controllerPassword,
                obscureText: true,
                decoration: const InputDecoration(
                  border: OutlineInputBorder(),
                  labelText: 'Password',
                ),
                onSubmitted: (String text) {
                  doLogin();
                },
              ),
              const SizedBox(height: 10),
              ElevatedButton(
                onPressed: doLogin,
                child: const Text("Login"),
              ),
            ],
          ),
        ),
      ),
    );
  }

  void doLogin() {
    String userName = controllerUserName.text;
    String password = controllerPassword.text;
    print("SUBMIT $userName / $password");
  }
}
Các hướng dẫn lập trình Flutter
- Hướng dẫn và ví dụ Flutter Column
- Hướng dẫn và ví dụ Flutter Stack
- Hướng dẫn và ví dụ Flutter IndexedStack
- Hướng dẫn và ví dụ Flutter Spacer
- Hướng dẫn và ví dụ Flutter Expanded
- Hướng dẫn và ví dụ Flutter SizedBox
- Hướng dẫn và ví dụ Flutter Tween
- Cài đặt Flutter SDK trên Windows
- Cài đặt Flutter Plugin cho Android Studio
- Tạo ứng dụng Flutter đầu tiên của bạn - Hello Flutter
- Hướng dẫn và ví dụ Flutter Scaffold
- Hướng dẫn và ví dụ Flutter AppBar
- Hướng dẫn và ví dụ Flutter BottomAppBar
- Hướng dẫn và ví dụ Flutter SliverAppBar
- Hướng dẫn và ví dụ Flutter TextButton
- Hướng dẫn và ví dụ Flutter ElevatedButton
- Hướng dẫn và ví dụ Flutter ShapeBorder
- Hướng dẫn và ví dụ Flutter EdgeInsetsGeometry
- Hướng dẫn và ví dụ Flutter EdgeInsets
- Hướng dẫn và ví dụ Flutter CircularProgressIndicator
- Hướng dẫn và ví dụ Flutter LinearProgressIndicator
- Hướng dẫn và ví dụ Flutter Center
- Hướng dẫn và ví dụ Flutter Align
- Hướng dẫn và ví dụ Flutter Row
- Hướng dẫn và ví dụ Flutter SplashScreen
- Hướng dẫn và ví dụ Flutter Alignment
- Hướng dẫn và ví dụ Flutter Positioned
- Hướng dẫn và ví dụ Flutter ListTile
- Hướng dẫn và ví dụ Flutter SimpleDialog
- Hướng dẫn và ví dụ Flutter AlertDialog
- Navigation và Routing trong Flutter
- Hướng dẫn và ví dụ Flutter Navigator
- Hướng dẫn và ví dụ Flutter TabBar
- Hướng dẫn và ví dụ Flutter Banner
- Hướng dẫn và ví dụ Flutter BottomNavigationBar
- Hướng dẫn và ví dụ Flutter FancyBottomNavigation
- Hướng dẫn và ví dụ Flutter Card
- Hướng dẫn và ví dụ Flutter Border
- Hướng dẫn và ví dụ Flutter ContinuousRectangleBorder
- Hướng dẫn và ví dụ Flutter RoundedRectangleBorder
- Hướng dẫn và ví dụ Flutter CircleBorder
- Hướng dẫn và ví dụ Flutter StadiumBorder
- Hướng dẫn và ví dụ Flutter Container
- Hướng dẫn và ví dụ Flutter RotatedBox
- Hướng dẫn và ví dụ Flutter CircleAvatar
- Hướng dẫn và ví dụ Flutter TextField
- Hướng dẫn và ví dụ Flutter IconButton
- Hướng dẫn và ví dụ Flutter FlatButton
- Hướng dẫn và ví dụ Flutter SnackBar
- Hướng dẫn và ví dụ Flutter Drawer
- Ví dụ Flutter Navigator pushNamedAndRemoveUntil
- Hiển thị hình ảnh trên Internet trong Flutter
- Hiển thị ảnh Asset trong Flutter
- Flutter TextInputType các kiểu bàn phím
- Hướng dẫn và ví dụ Flutter NumberTextInputFormatter
- Hướng dẫn và ví dụ Flutter Builder
- Làm sao xác định chiều rộng của Widget cha trong Flutter
- Bài thực hành Flutter thiết kế giao diện màn hình đăng nhập
- Bài thực hành Flutter thiết kế giao diện trang (1)
- Khuôn mẫu thiết kế Flutter với các lớp trừu tượng
- Bài thực hành Flutter thiết kế trang Profile với Stack
- Bài thực hành Flutter thiết kế trang profile (2)
- Hướng dẫn và ví dụ Flutter ListView
- Hướng dẫn và ví dụ Flutter GridView
- Bài thực hành Flutter với gói http và dart:convert (2)
- Bài thực hành Flutter với gói http và dart:convert (1)
- Ứng dụng Flutter Responsive với Menu Drawer
- Flutter GridView với SliverGridDelegate tuỳ biến
- Hướng dẫn và ví dụ Flutter image_picker
- Flutter upload ảnh sử dụng http và ImagePicker
- Hướng dẫn và ví dụ Flutter SharedPreferences
- Chỉ định cổng cố định cho Flutter Web trên Android Studio
- Tạo Module trong Flutter
- Hướng dẫn và ví dụ Flutter SkeletonLoader
- Hướng dẫn và ví dụ Flutter Slider
- Hướng dẫn và ví dụ Flutter Radio
- Bài thực hành Flutter SharedPreferences
- Hướng dẫn và ví dụ Flutter InkWell
- Hướng dẫn và ví dụ Flutter GetX GetBuilder
- Hướng dẫn và ví dụ Flutter GetX obs Obx
- Hướng dẫn và ví dụ Flutter flutter_form_builder
- Xử lý lỗi 404 trong Flutter GetX
- Flutter BloC cho người mới bắt đầu
- Ví dụ đăng nhập và đăng xuất với Flutter Getx
- Hướng dẫn và ví dụ Flutter multi_dropdown
Show More
