Hiển thị ảnh Asset trong Flutter
Ứng dụng Flutter có thể bao gồm mã và tài nguyên nguyên tĩnh chẳng hạn như hình ảnh và Font,.. Trong bài viết này chúng ta sẽ thảo luận về cách thiết lập tài nguyên ảnh và hiển thị chúng trong Flutter.
Xem thêm về việc sử dụng Assets trong các modules:
1. Thiết lập tài nguyên ảnh
Trên dự án Flutter tạo thư mục "my-static-rs" với hai thư mục con "images" và "icons". Sau đó copy các hình ảnh và các biểu tượng (icon) của bạn vào 2 thư mục con này.
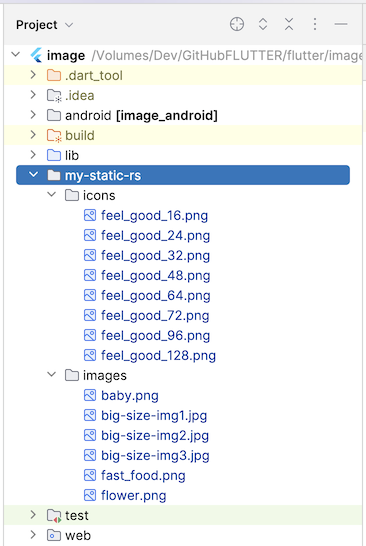
Tiếp theo, trong file "pubspec.yaml" bạn cần khai báo thư mục chứa các hình ảnh. Chú ý: Phía sau tên thư mục cần có ký tự "/". Tất cả các hình ảnh trong các thư mục này sẽ được nhận biết bởi Flutter và có thể sử dụng trong dự án.
pubspec.yaml
# The following section is specific to Flutter packages.
flutter:
  assets:
    - my-static-rs/images/
    - my-static-rs/icons/
Thay vì khai báo các thư mục bạn có thể chỉ khai báo các file ảnh cụ thể mà bạn mà ứng dụng Flutter của bạn sử dụng đến.
pubspec.yaml
flutter:
  assets:
    - my-static-rs/icons/feed_good_16.png
    - my-static-rs/icons/feed_good_128.png
    - my-static-rs/images/baby.png
2. Các ví dụ
Sử dụng constructor Image.asset() để hiển thị một hình ảnh mà bạn đã thiết lập ở bước trên.
Image.asset(
    String name, {
    super.key,
    AssetBundle? bundle,
    this.frameBuilder,
    this.errorBuilder,
    this.semanticLabel,
    this.excludeFromSemantics = false,
    double? scale,
    this.width,
    this.height,
    this.color,
    this.opacity,
    this.colorBlendMode,
    this.fit,
    this.alignment = Alignment.center,
    this.repeat = ImageRepeat.noRepeat,
    this.centerSlice,
    this.matchTextDirection = false,
    this.gaplessPlayback = false,
    this.isAntiAlias = false,
    String? package,
    this.filterQuality = FilterQuality.low,
    int? cacheWidth,
    int? cacheHeight,
}) 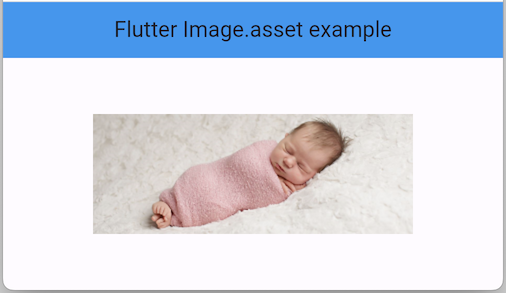
Image.asset(
      'my-static-rs/images/baby.png',
)
Ví dụ:
Image sẽ tự động điều chỉnh kích thước của nó nếu nó được đặt trong một SizedBox hoặc một Container có kích thước cụ thể.
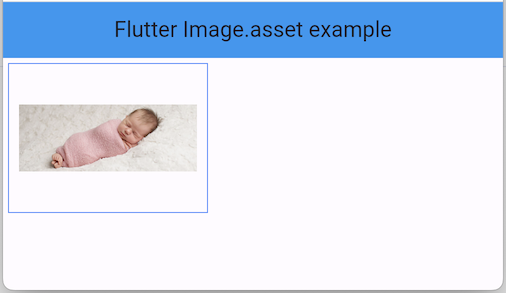
Container(
  width: 200,
  height: 150,
  decoration: BoxDecoration(
    border: Border.all(color: Colors.blueAccent),
  ),
  margin: const EdgeInsets.all(5),
  padding: const EdgeInsets.all(10),
  child: Center(
    child: Image.asset(
      'my-static-rs/images/baby.png',
    ),
  ),
);
Ví dụ:
Chỉ định kích thước cho Image thông qua thuộc tính width, height.
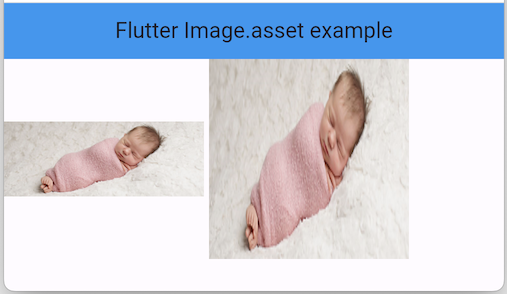
Row(
  children: [
    Image.asset(
      'my-static-rs/images/baby.png',
      width: 200,
      height: 200,
    ),
    const SizedBox(width: 5),
    Image.asset(
      'my-static-rs/images/baby.png',
      width: 200,
      height: 200,
      fit: BoxFit.fill,
    ),
  ],
);
Ví dụ:
Độ mờ đục của ảnh.
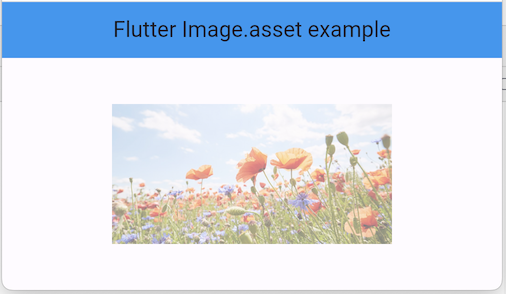
Image.asset(
        'my-static-rs/images/flower.png',
        width: 320,
        height: 140,
        opacity: const AlwaysStoppedAnimation(.5),
)
3. frameBuilder
typedef ImageFrameBuilder = Widget Function(
  BuildContext context,
  Widget child,
  int? frame,
  bool wasSynchronouslyLoaded,
);

final ImageFrameBuilder? frameBuilder;
frameBuilder | Được sử dụng để vẽ hình ảnh trên giao diện. Trong quá trình ảnh được vẽ trên giao diện bạn có thể tạo hiệu ứng nào đó, chẳng hạn hiệu ứng độ mờ (opacity) tăng dần. |
Ví dụ, hiệu ứng độ mờ (opacity) trong quá trình hiển thị ảnh.
image_asset_ex4.dart
import 'package:flutter/material.dart';

void main() {
  runApp(const MyApp());
}

class MyApp extends StatelessWidget {
  const MyApp({super.key});

  @override
  Widget build(BuildContext context) {
    return MaterialApp(
      title: 'Flutter Image.asset example',
      debugShowCheckedModeBanner: false,
      theme: ThemeData(
        colorScheme: ColorScheme.fromSeed(seedColor: Colors.deepPurple),
        useMaterial3: true,
      ),
      home: MyHomePage(),
    );
  }
}

class MyHomePage extends StatefulWidget {
  @override
  State<StatefulWidget> createState() {
    return _MyHomePageState();
  }
}

class _MyHomePageState extends State<MyHomePage> {
  List<String> imageUrls = [
    'my-static-rs/images/big-size-img1.jpg',
    'my-static-rs/images/big-size-img2.jpg',
    'my-static-rs/images/big-size-img3.jpg',
  ];
  int idx = 0;
  late String imageUrl;

  @override
  void initState() {
    super.initState();
    imageUrl = imageUrls[idx];
  }

  @override
  Widget build(BuildContext context) {
    return Scaffold(
      appBar: AppBar(
        title: const Text('Flutter Image.asset example'),
        backgroundColor: Colors.blue,
      ),
      body: buildImage(),
    );
  }

  Widget buildImage() {
    return Column(
      children: [
        Image.asset(
          imageUrl,
          width: 250,
          height: 120,
          frameBuilder: (BuildContext context, Widget child, int? frame,
              bool wasSynchronouslyLoaded) {
            if (wasSynchronouslyLoaded) {
              return child;
            }
            print("frame: $frame");
            return AnimatedOpacity(
              opacity: frame == null ? 0 : 1,
              duration: const Duration(seconds: 1),
              curve: Curves.linear,
              child: child,
            );
          },
        ),
        const SizedBox(height: 10),
        ElevatedButton(
          onPressed: () {
            imageCache.clear(); // Clear Image Cache!!
            imageCache.clearLiveImages(); // Clear Image Cache!!
            idx++;
            idx = idx % imageUrls.length;
            imageUrl = imageUrls[idx];
            print('Image URL: $imageUrl');
            setState(() {});
          },
          child: const Text("Next Image"),
        ),
      ],
    );
  }
}
4. Xử lý lỗi
Khi có lỗi xẩy ra trong quá trình tải ảnh bạn có thể hiển thị một ảnh khác thay thế.
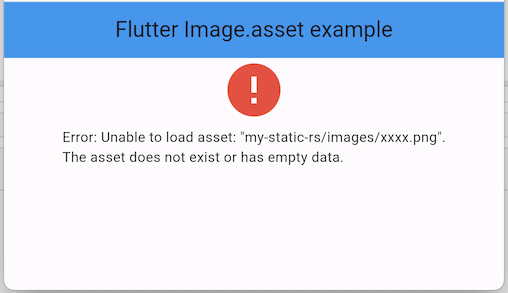
Image.asset(
  'my-static-rs/images/xxxx.png', // 404
  width: 320,
  height: 140,
  errorBuilder: (
    BuildContext context,
    Object error,
    StackTrace? stackTrace,
  ) {
    return Column(
      children: [
        const Icon(
          Icons.error,
          size: 64,
          color: Colors.red,
        ),
        const SizedBox(height: 5),
        Text('Error: ${error.toString()}')
      ],
    );
  },
),
Các hướng dẫn lập trình Flutter
- Hướng dẫn và ví dụ Flutter Column
- Hướng dẫn và ví dụ Flutter Stack
- Hướng dẫn và ví dụ Flutter IndexedStack
- Hướng dẫn và ví dụ Flutter Spacer
- Hướng dẫn và ví dụ Flutter Expanded
- Hướng dẫn và ví dụ Flutter SizedBox
- Hướng dẫn và ví dụ Flutter Tween
- Cài đặt Flutter SDK trên Windows
- Cài đặt Flutter Plugin cho Android Studio
- Tạo ứng dụng Flutter đầu tiên của bạn - Hello Flutter
- Hướng dẫn và ví dụ Flutter Scaffold
- Hướng dẫn và ví dụ Flutter AppBar
- Hướng dẫn và ví dụ Flutter BottomAppBar
- Hướng dẫn và ví dụ Flutter SliverAppBar
- Hướng dẫn và ví dụ Flutter TextButton
- Hướng dẫn và ví dụ Flutter ElevatedButton
- Hướng dẫn và ví dụ Flutter ShapeBorder
- Hướng dẫn và ví dụ Flutter EdgeInsetsGeometry
- Hướng dẫn và ví dụ Flutter EdgeInsets
- Hướng dẫn và ví dụ Flutter CircularProgressIndicator
- Hướng dẫn và ví dụ Flutter LinearProgressIndicator
- Hướng dẫn và ví dụ Flutter Center
- Hướng dẫn và ví dụ Flutter Align
- Hướng dẫn và ví dụ Flutter Row
- Hướng dẫn và ví dụ Flutter SplashScreen
- Hướng dẫn và ví dụ Flutter Alignment
- Hướng dẫn và ví dụ Flutter Positioned
- Hướng dẫn và ví dụ Flutter ListTile
- Hướng dẫn và ví dụ Flutter SimpleDialog
- Hướng dẫn và ví dụ Flutter AlertDialog
- Navigation và Routing trong Flutter
- Hướng dẫn và ví dụ Flutter Navigator
- Hướng dẫn và ví dụ Flutter TabBar
- Hướng dẫn và ví dụ Flutter Banner
- Hướng dẫn và ví dụ Flutter BottomNavigationBar
- Hướng dẫn và ví dụ Flutter FancyBottomNavigation
- Hướng dẫn và ví dụ Flutter Card
- Hướng dẫn và ví dụ Flutter Border
- Hướng dẫn và ví dụ Flutter ContinuousRectangleBorder
- Hướng dẫn và ví dụ Flutter RoundedRectangleBorder
- Hướng dẫn và ví dụ Flutter CircleBorder
- Hướng dẫn và ví dụ Flutter StadiumBorder
- Hướng dẫn và ví dụ Flutter Container
- Hướng dẫn và ví dụ Flutter RotatedBox
- Hướng dẫn và ví dụ Flutter CircleAvatar
- Hướng dẫn và ví dụ Flutter TextField
- Hướng dẫn và ví dụ Flutter IconButton
- Hướng dẫn và ví dụ Flutter FlatButton
- Hướng dẫn và ví dụ Flutter SnackBar
- Hướng dẫn và ví dụ Flutter Drawer
- Ví dụ Flutter Navigator pushNamedAndRemoveUntil
- Hiển thị hình ảnh trên Internet trong Flutter
- Hiển thị ảnh Asset trong Flutter
- Flutter TextInputType các kiểu bàn phím
- Hướng dẫn và ví dụ Flutter NumberTextInputFormatter
- Hướng dẫn và ví dụ Flutter Builder
- Làm sao xác định chiều rộng của Widget cha trong Flutter
- Bài thực hành Flutter thiết kế giao diện màn hình đăng nhập
- Bài thực hành Flutter thiết kế giao diện trang (1)
- Khuôn mẫu thiết kế Flutter với các lớp trừu tượng
- Bài thực hành Flutter thiết kế trang Profile với Stack
- Bài thực hành Flutter thiết kế trang profile (2)
- Hướng dẫn và ví dụ Flutter ListView
- Hướng dẫn và ví dụ Flutter GridView
- Bài thực hành Flutter với gói http và dart:convert (2)
- Bài thực hành Flutter với gói http và dart:convert (1)
- Ứng dụng Flutter Responsive với Menu Drawer
- Flutter GridView với SliverGridDelegate tuỳ biến
- Hướng dẫn và ví dụ Flutter image_picker
- Flutter upload ảnh sử dụng http và ImagePicker
- Hướng dẫn và ví dụ Flutter SharedPreferences
- Chỉ định cổng cố định cho Flutter Web trên Android Studio
- Tạo Module trong Flutter
- Hướng dẫn và ví dụ Flutter SkeletonLoader
- Hướng dẫn và ví dụ Flutter Slider
- Hướng dẫn và ví dụ Flutter Radio
- Bài thực hành Flutter SharedPreferences
- Hướng dẫn và ví dụ Flutter InkWell
- Hướng dẫn và ví dụ Flutter GetX GetBuilder
- Hướng dẫn và ví dụ Flutter GetX obs Obx
- Hướng dẫn và ví dụ Flutter flutter_form_builder
- Xử lý lỗi 404 trong Flutter GetX
- Flutter BloC cho người mới bắt đầu
- Ví dụ đăng nhập và đăng xuất với Flutter Getx
- Hướng dẫn và ví dụ Flutter multi_dropdown
Show More
