Hướng dẫn và ví dụ Android ImageSwitcher
1. Tổng quan về ImageSwitcher
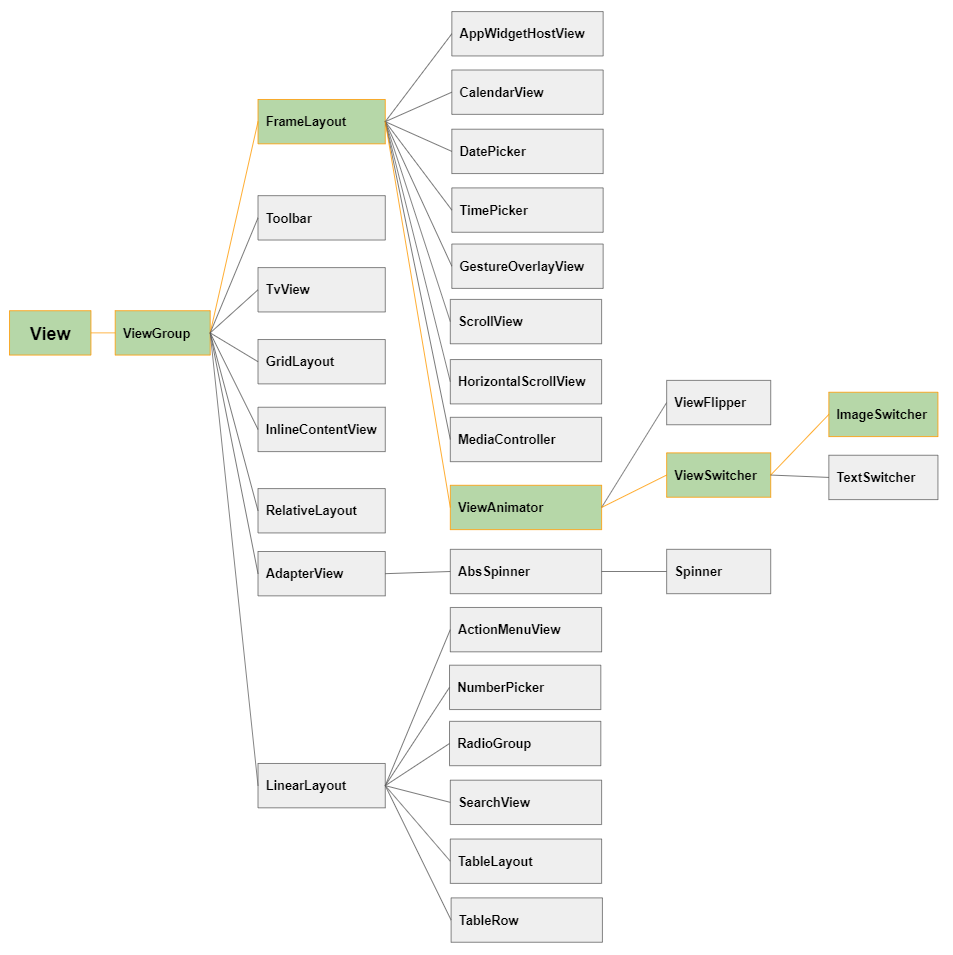
Đây là hình ảnh một ứng dụng sử dụng ImageSwitcher:
- TODO: Viết chém gió thêm.
2. Ví dụ với Android ImageSwitcher
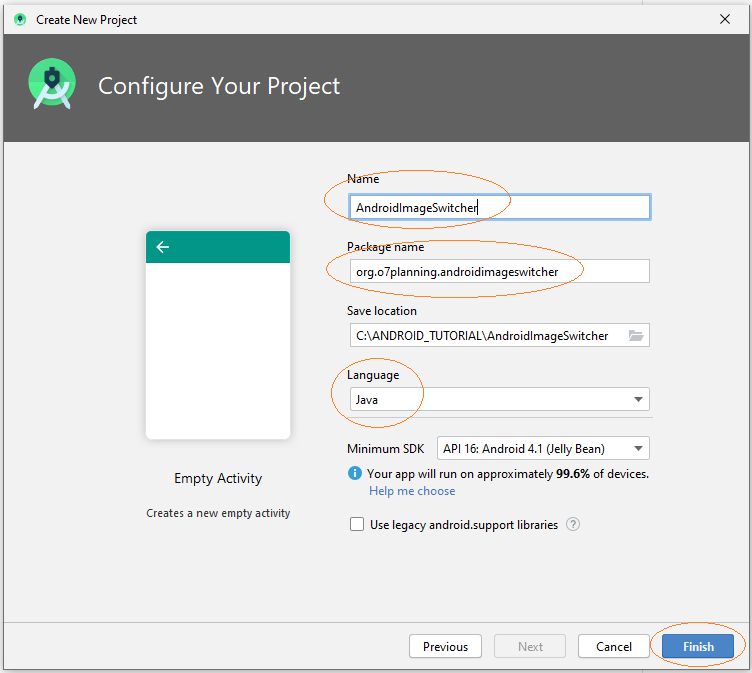
Tạo project có tên AndroidImageSwitcher:
- File > New Project > Empty Activity
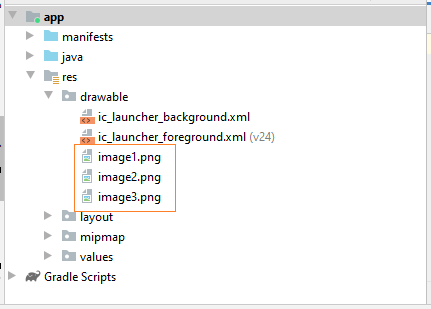
Bạn cần một vài ảnh tham gia vào trong ví dụ:
image1.png |  |
image2.png |  |
image3.png |  |
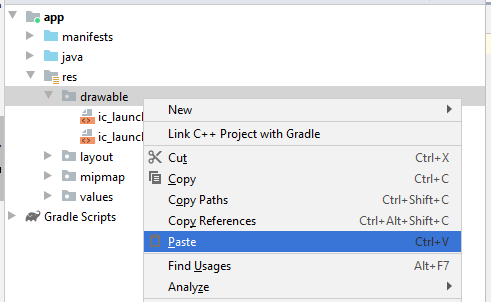
Copy các ảnh trên vào thư mục drawable.

Giao diện ứng dụng:
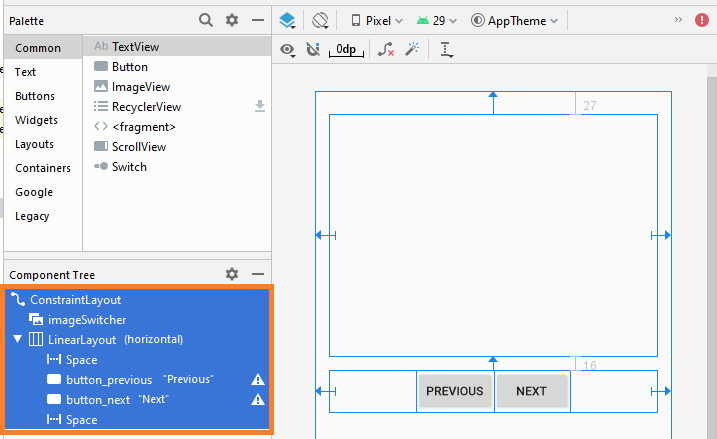
Nếu bạn quan tâm tới các bước để thiết kế giao diện của ứng dụng này hãy xem phần phụ lục phía cuối bài viết.
main_actvity.xml
<?xml version="1.0" encoding="utf-8"?>
<androidx.constraintlayout.widget.ConstraintLayout
    xmlns:android="http://schemas.android.com/apk/res/android"
    xmlns:app="http://schemas.android.com/apk/res-auto"
    xmlns:tools="http://schemas.android.com/tools"
    android:layout_width="match_parent"
    android:layout_height="match_parent"
    tools:context=".MainActivity">

    <ImageSwitcher
        android:id="@+id/imageSwitcher"
        android:layout_width="0dp"
        android:layout_height="279dp"
        android:layout_marginStart="16dp"
        android:layout_marginLeft="16dp"
        android:layout_marginTop="27dp"
        android:layout_marginEnd="16dp"
        android:layout_marginRight="16dp"
        app:layout_constraintEnd_toEndOf="parent"
        app:layout_constraintStart_toStartOf="parent"
        app:layout_constraintTop_toTopOf="parent" />

    <LinearLayout
        android:layout_width="0dp"
        android:layout_height="wrap_content"
        android:layout_marginStart="16dp"
        android:layout_marginLeft="16dp"
        android:layout_marginTop="16dp"
        android:layout_marginEnd="16dp"
        android:layout_marginRight="16dp"
        android:orientation="horizontal"
        app:layout_constraintEnd_toEndOf="parent"
        app:layout_constraintStart_toStartOf="parent"
        app:layout_constraintTop_toBottomOf="@+id/imageSwitcher">

        <Space
            android:layout_width="wrap_content"
            android:layout_height="wrap_content"
            android:layout_weight="1" />

        <Button
            android:id="@+id/button_previous "
            android:layout_width="wrap_content"
            android:layout_height="wrap_content"
            android:layout_weight="0"
            android:text="Previous" />

        <Button
            android:id="@+id/button_next"
            android:layout_width="wrap_content"
            android:layout_height="wrap_content"
            android:layout_weight="0"
            android:text="Next" />

        <Space
            android:layout_width="wrap_content"
            android:layout_height="wrap_content"
            android:layout_weight="1" />
    </LinearLayout>

</androidx.constraintlayout.widget.ConstraintLayout>
MainActivity.java
package org.o7planning.androidimageswitcher;

import android.os.Bundle;
import android.app.ActionBar.LayoutParams;
import android.graphics.Color;
import android.util.Log;
import android.view.View;
import android.view.animation.Animation;
import android.view.animation.AnimationUtils;
import android.widget.Button;
import android.widget.ImageSwitcher;
import android.widget.ImageView;
import android.widget.Toast;
import android.widget.ViewSwitcher.ViewFactory;

import androidx.appcompat.app.AppCompatActivity;

public class MainActivity extends AppCompatActivity {

    private ImageSwitcher imageSwitcher;
    private Button buttonPrevious;
    private Button buttonNext;

    private final String[] imageNames={"image1", "image2", "image3"};
    private int currentIndex;

    @Override
    protected void onCreate(Bundle savedInstanceState) {
        super.onCreate(savedInstanceState);

        setContentView(R.layout.activity_main);

        buttonPrevious = (Button) findViewById(R.id.button_previous);
        buttonNext = (Button) findViewById(R.id.button_next);

        imageSwitcher = (ImageSwitcher) findViewById(R.id.imageSwitcher);

        // Animation when switching to another image.
        Animation out= AnimationUtils.loadAnimation(this, android.R.anim.fade_out);
        Animation in= AnimationUtils.loadAnimation(this, android.R.anim.fade_in);

        // Set animation when switching images.
        imageSwitcher.setInAnimation(in);
        imageSwitcher.setOutAnimation(out);

        //
        imageSwitcher.setFactory(new ViewFactory() {

            // Returns the view to show Image
            // (Usually should use ImageView)
            @Override
            public View makeView() {
                ImageView imageView = new ImageView(getApplicationContext());

                imageView.setBackgroundColor(Color.LTGRAY);
                imageView.setScaleType(ImageView.ScaleType.CENTER);

                ImageSwitcher.LayoutParams params= new ImageSwitcher.LayoutParams(
                        LayoutParams.MATCH_PARENT, LayoutParams.MATCH_PARENT);
                imageView.setLayoutParams(params);
                return imageView;
            }
        });

        this.currentIndex=0;
        this.showImage(this.currentIndex);

        buttonPrevious.setOnClickListener(new View.OnClickListener() {
            @Override
            public void onClick(View v) {
                previousImage();
            }
        });

        buttonNext.setOnClickListener(new View.OnClickListener() {
            @Override
            public void onClick(View v) {
                nextImage();
            }
        });
    }


    private void previousImage()  {
        if(currentIndex > 0) {
            currentIndex--;
        }else  {
            Toast.makeText(getApplicationContext(), "No Previous Image", Toast.LENGTH_SHORT).show();
            return;
        }
        this.showImage(currentIndex);
    }

    private void nextImage()  {
        if(currentIndex < this.imageNames.length-1) {
            currentIndex++;
        }else  {
            Toast.makeText(getApplicationContext(), "No Next Image", Toast.LENGTH_SHORT).show();
            return;
        }
        this.showImage(currentIndex);
    }


    private void showImage(int imgIndex)  {
        String imageName= this.imageNames[imgIndex];

        int resId= getDrawableResIdByName(imageName);
        if(resId!=  0) {
            this.imageSwitcher.setImageResource(resId);
        }
    }

    // Find Image ID corresponding to the name of the image (in the drawable folder).
    public int getDrawableResIdByName(String resName)  {
        String pkgName = this.getPackageName();
        // Return 0 if not found.
        int resID = this.getResources().getIdentifier(resName , "drawable", pkgName);
        Log.i("MyLog", "Res Name: " + resName + "==> Res ID = " + resID);
        return resID;
    }

}
Chạy ứng dụng:

3. Phụ lục: Thiết kế giao diện
Tôi không biết tại sao ImageSwitcher không sẵn có trên cửa sổ thiết kế của Android Studio 3.6.x, vì vậy bạn không thể kéo thả nó vào giao diện. Cách tốt nhất là thêm đoạn mã XML sau đây vào tập tin activity_main.xml và bạn sẽ có được ImageSwitcher trên giao diện.
<ImageSwitcher
        android:layout_width="100dp"
        android:layout_height="100dp" />
Sét đặt ID, Text cho các thành phần trên giao diện.

Các hướng dẫn lập trình Android
- Cấu hình Android Emulator trong Android Studio
- Hướng dẫn và ví dụ Android ToggleButton
- Tạo một File Finder Dialog đơn giản trong Android
- Hướng dẫn và ví dụ Android TimePickerDialog
- Hướng dẫn và ví dụ Android DatePickerDialog
- Bắt đầu với Android cần những gì?
- Cài đặt Android Studio trên Windows
- Cài đặt Intel® HAXM cho Android Studio
- Hướng dẫn và ví dụ Android AsyncTask
- Hướng dẫn và ví dụ Android AsyncTaskLoader
- Hướng dẫn lập trình Android cho người mới bắt đầu - Các ví dụ cơ bản
- Làm sao biết số số điện thoại của Android Emulator và thay đổi nó
- Hướng dẫn và ví dụ Android TextInputLayout
- Hướng dẫn và ví dụ Android CardView
- Hướng dẫn và ví dụ Android ViewPager2
- Lấy số điện thoại trong Android sử dụng TelephonyManager
- Hướng dẫn và ví dụ Android Phone Call
- Hướng dẫn và ví dụ Android Wifi Scanning
- Hướng dẫn lập trình Android Game 2D cho người mới bắt đầu
- Hướng dẫn và ví dụ Android DialogFragment
- Hướng dẫn và ví dụ Android CharacterPickerDialog
- Hướng dẫn lập trình Android cho người mới bắt đầu - Hello Android
- Hướng dẫn sử dụng Android Device File Explorer
- Bật tính năng USB Debugging trên thiết bị Android
- Hướng dẫn và ví dụ Android UI Layouts
- Hướng dẫn và ví dụ Android SMS
- Hướng dẫn lập trình Android với Database SQLite
- Hướng dẫn và ví dụ Google Maps Android API
- Hướng dẫn chuyển văn bản thành lời nói trong Android
- Hướng dẫn và ví dụ Android Space
- Hướng dẫn và ví dụ Android Toast
- Tạo một Android Toast tùy biến
- Hướng dẫn và ví dụ Android SnackBar
- Hướng dẫn và ví dụ Android TextView
- Hướng dẫn và ví dụ Android TextClock
- Hướng dẫn và ví dụ Android EditText
- Hướng dẫn và ví dụ Android TextWatcher
- Định dạng số thẻ tín dụng với Android TextWatcher
- Hướng dẫn và ví dụ Android Clipboard
- Tạo một File Chooser đơn giản trong Android
- Hướng dẫn và ví dụ Android AutoCompleteTextView và MultiAutoCompleteTextView
- Hướng dẫn và ví dụ Android ImageView
- Hướng dẫn và ví dụ Android ImageSwitcher
- Hướng dẫn và ví dụ Android ScrollView và HorizontalScrollView
- Hướng dẫn và ví dụ Android WebView
- Hướng dẫn và ví dụ Android SeekBar
- Hướng dẫn và ví dụ Android Dialog
- Hướng dẫn và ví dụ Android AlertDialog
- Hướng dẫn và ví dụ Android RatingBar
- Hướng dẫn và ví dụ Android ProgressBar
- Hướng dẫn và ví dụ Android Spinner
- Hướng dẫn và ví dụ Android Button
- Hướng dẫn và ví dụ Android Switch
- Hướng dẫn và ví dụ Android ImageButton
- Hướng dẫn và ví dụ Android FloatingActionButton
- Hướng dẫn và ví dụ Android CheckBox
- Hướng dẫn và ví dụ Android RadioGroup và RadioButton
- Hướng dẫn và ví dụ Android Chip và ChipGroup
- Sử dụng các tài sản ảnh và biểu tượng của Android Studio
- Thiết lập SD Card cho Android Emulator
- Ví dụ với ChipGroup và các Chip Entry
- Làm sao thêm thư viện bên ngoài vào dự án Android trong Android Studio?
- Làm sao loại bỏ các quyền đã cho phép trên ứng dụng Android
- Làm sao loại bỏ các ứng dụng ra khỏi Android Emulator?
- Hướng dẫn và ví dụ Android LinearLayout
- Hướng dẫn và ví dụ Android TableLayout
- Hướng dẫn và ví dụ Android FrameLayout
- Hướng dẫn và ví dụ Android QuickContactBadge
- Hướng dẫn và ví dụ Android StackView
- Hướng dẫn và ví dụ Android Camera
- Hướng dẫn và ví dụ Android MediaPlayer
- Hướng dẫn và ví dụ Android VideoView
- Phát hiệu ứng âm thanh trong Android với SoundPool
- Hướng dẫn lập trình mạng trong Android - Android Networking
- Hướng dẫn xử lý JSON trong Android
- Lưu trữ dữ liệu trên thiết bị với Android SharedPreferences
- Hướng dẫn lập trình Android với bộ lưu trữ trong (Internal Storage)
- Hướng dẫn lập trình Android với bộ lưu trữ ngoài (External Storage)
- Hướng dẫn sử dụng Intent trong Android
- Ví dụ về một Android Intent tường minh, gọi một Intent khác
- Ví dụ về Android Intent không tường minh, mở một URL, gửi một email
- Hướng dẫn sử dụng Service trong Android
- Hướng dẫn sử dụng thông báo trong Android - Android Notification
- Hướng dẫn và ví dụ Android DatePicker
- Hướng dẫn và ví dụ Android TimePicker
- Hướng dẫn và ví dụ Android Chronometer
- Hướng dẫn và ví dụ Android OptionMenu
- Hướng dẫn và ví dụ Android ContextMenu
- Hướng dẫn và ví dụ Android PopupMenu
- Hướng dẫn và ví dụ Android Fragment
- Hướng dẫn và ví dụ Android ListView
- Android ListView với Checkbox sử dụng ArrayAdapter
- Hướng dẫn và ví dụ Android GridView
Show More
